
This article explains how you can design and customize a name badge with Eventboost
Eventboost allows you to design and customize fully white labeled name badges in minutes. The intuitive badge builder enables you to select a badge template, and customize it by adding images, static text, and the QR Code.
You can change the font type, the text size and use Fields to automatically recall relevant information about your attendees from your guests list such as Name, Last Name, Company, Job Title, or any other information you want to place on the badge.
You will find two types of buttons on the badge builder: the "eye" and the "pencil". The eye button enables you to make a section of your badge visible, while the pencil button allows you to upload images or edit a section. Depending on the chosen badge size, you might have different types of sections.
When the name is ready, you can generate the name badges in different pdf formats and for different types of guests (Invitees or Registrants), as well as enable options such as:
- Enable print@home - to allow guests to download their badge directly from the event confirmation email
- Enable print on-site - to print badges from the "Check-in" tab of your event dashboard
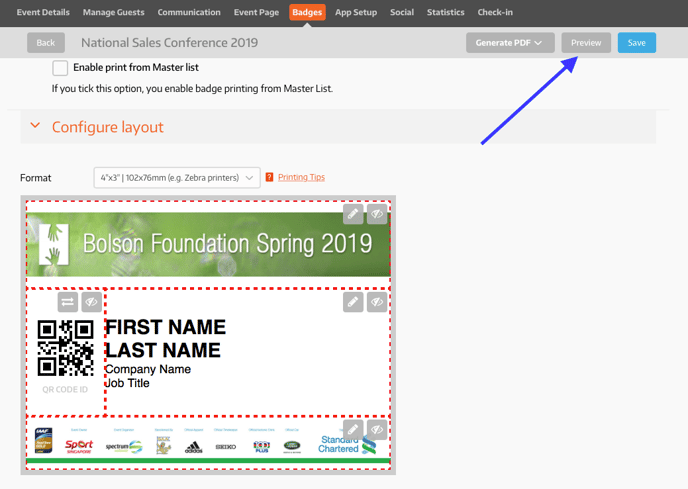
- Enable print from Master List - to activate the "Print Badge" button on the event Master List and print guests badges from there. Check the following article to learn how to print name badges from the event Master List: Print Name Badges from the guests Master List.
Start customizing your name badges
1. Go to the "Badge" tab on your event dashboard and click the "Add Badge" box. Enter a badge name and choose the badge format. Click Save.
2. Decide which sections will be visible on your badge and customize it by uploading images (header and footer) directly from your pc or laptop.
3. Add Fields on the "Guest Info" section to include attendees' relevant information (Name, Last Name, Company, or any other desired information). Choose the font type and size, as well as if you want guests' info on the same line or in uppercase.
4. Click the "Preview" button on the top-right of your badge dashboard to check how your artwork looks like.
See you online!