
Apply conditional rules to registration fields to create smart and tailored registration forms for your events.
Eventboost allows you to hide registration fields from your form and make them available only when a particular answer to a specific question is given. For instance, if you want to collect accommodation preferences just for guests who need accommodation for the event, you can configure a registration field that appears only when a guest answers "Yes" to the question "Do you need any accommodation"?
That is just an example of how you can apply conditional rules to registration fields and tailor your registration forms to make them more interactive to collect the data you need without affecting the user experience. Let's see how you can build a customized conditional form.
1. Firstly, make sure you have already added the registration fields to your event (check the article "How do I add fields to my event" to learn how to add fields manually or to use an Excel spreadsheet).
2. You can access the Manage registration form dashboard from three different tabs:
- "Manage Guests" tab - Manage Guests -> Manage registration form button on the top-right).
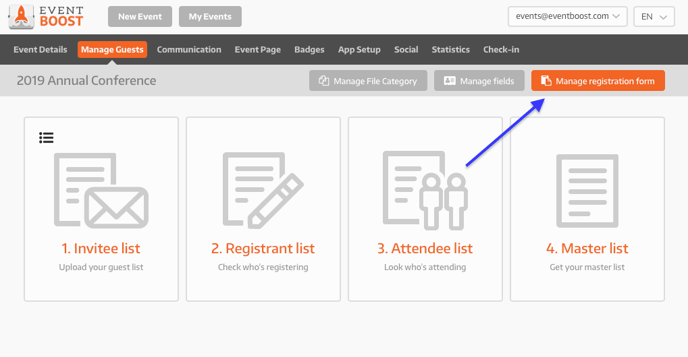
- "Manage Fields" tab (Manage Guests -> Manage Fields -> Manage registration form )and the "Event Page" tab (scroll down the page and click the pencil button on the top-right of the registration form section).
- "Event Page" tab - there is a button with a small pencil on the registration form area of the event page builder. That button redirects directly to the Manage registration form dashboard.
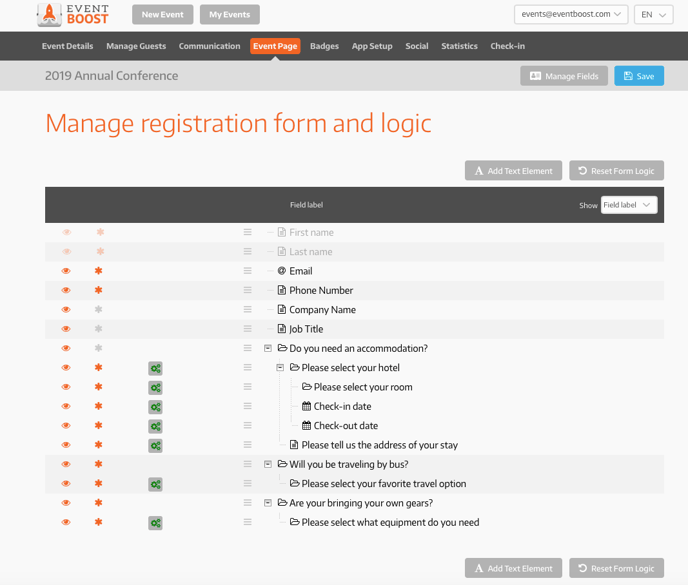
3. Before applying conditional logic or rules to the fields, decide which field would be visible and mandatory / not mandatory on the registration form by clicking on the "eye" and the "asterisk" button; the icons turn orange when active.
4. Before applying rules and conditional logic, you need to build the registration form logic structure. In other words, you need to define which field or group of fields will be following a specific rule or logic.
- Select one or more fields. To select more than one field, press and hold the Ctrl key of your keyboard if you are using a Windows pc/laptop; if you are using an Apple pc/laptop, press and hold the Command key. While holding down the Ctrl/Command key, click each of the other fields you want to select.
- Move the filed or the group of fields with drag and drop on the field that will start the conditional logic.
- Click the gear icon of each of the field to set the rules. When you have done, click OK; the gear button will turn green to show you that the logic has been successfully applied.
- To check which rule has been applied, just move the mouse's cursor on the gear button without clicking; the system will show you the conditional logic previously sets.
5. Apply conditional logic and rules to individual or multiple fields to personalize your registration form. Don't forget to save it!
6. If you want to check what you have done, go back to the Event Page and click the "Show Page" button to open the registration page and test the form.
7. Enjoy your customized registration form!
See you online!