
Learn how to use the Manage Sessions' Visibility feature to make sessions visible only to specific types of guests.
Eventboost allows you to manage the visibility of each session using the values of a single-choice field. You can assign values to guests in the invitee list manually or during the list upload, and then ensure they would only see sessions you want them to see or register to.
NOTE: To use this feature, your event needs at least one single-choice field to be used as a "trigger" for this logic. You can check the following article to learn how to add single-choice fields manually or via Excel file: "How to Create a Single-Choice Field".
In this article, you will:
How the "Manage Sessions' Visibility" feature works
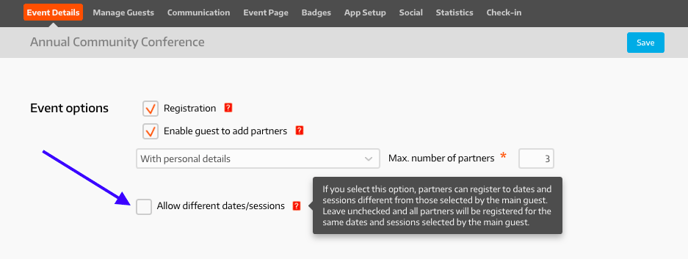
You can configure the visibility of each session from the Event Details tab by scrolling down until the Event Schedule section and clicking the Manage Sessions' Visibility link located in the "Registration options" area.
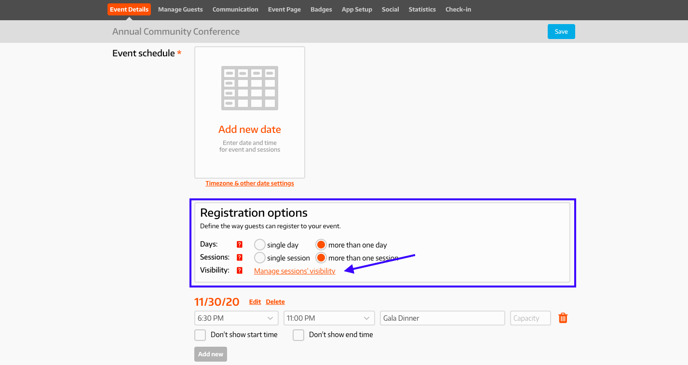
NOTE: The registration options area is visible only when your event has more than one day or session, which means that you can use the Manage Sessions' Visibility feature only for events with more than one day or session.
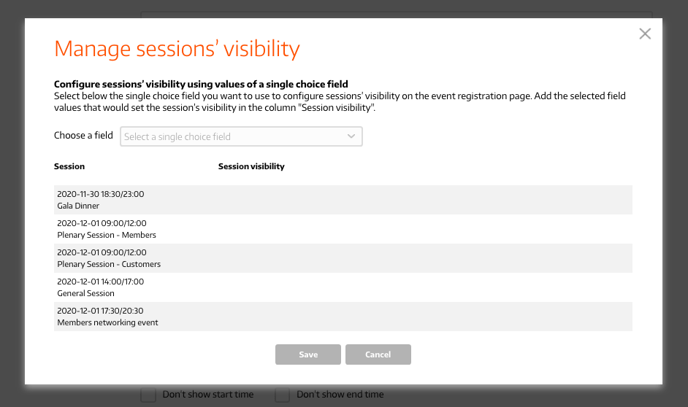
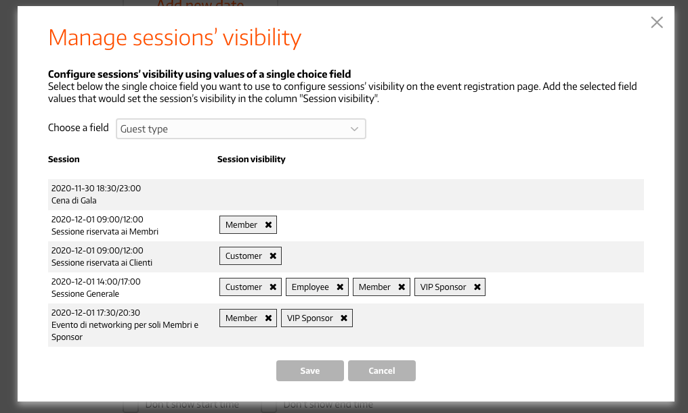
When you click on the Manage sessions' visibility link, a pop-up window will open, enabling you to set the visibility for each of your sessions.
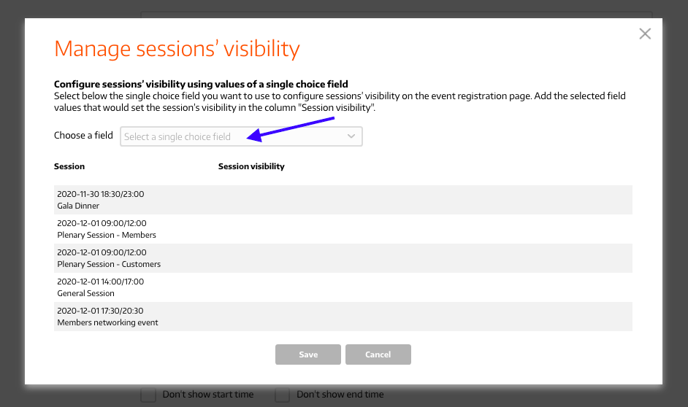
First of all, you need to select the single-choice field you want to use as a "trigger" to initiate the sessions' visibility logic.
Then, click on the session's area below the "Session visibility" column; a drop-down menu will open, allowing you to search and select the field's value you want to use to set the visibility for that specific session. Click "Save" anytime you need to save the configuration; it won't close the pop-up window but will ensure you won't lose the work done.
TIP: You can select more than one value per session and use the "Select/Deselect ALL visible" box to select/deselect all values at once.

IMPORTANT NOTE:
- When you choose a value, the session will be visible only to guests who are associated with that specific value in the invitee list.
- Sessions with no values associated would be visible to all guests, regardless of their type or any associated field value.
- Following the example above, shouldn't a guest having any of the values of the "trigger" field (therefore the guest has an empty field in the invitee list), he will only see sessions for which the visibility logic has not been configured.
A real example of how you can make sessions visible to specific guests types
In this example (you can also watch the related video below), to ensure a correct registration flow, our user Lucinda needs to make some events and sessions visible only to particular types of guests.
In this specific scenario, Lucinda has already uploaded an invitee list that contains several custom fields, including the one called "Guest type". It is a single-choice field that allows her, among other things, to filter guests by their category, include them into recipients to send tailored email messages, as well as determine which events and sessions they will be able to see and register to.
The "Guest type" field contains the following values: "VIP Sponsor", "Member", "Customer", "Employee", and "Staff".
Also, Lucinda has already created events and breakout sessions for which she wants to set the visibility.
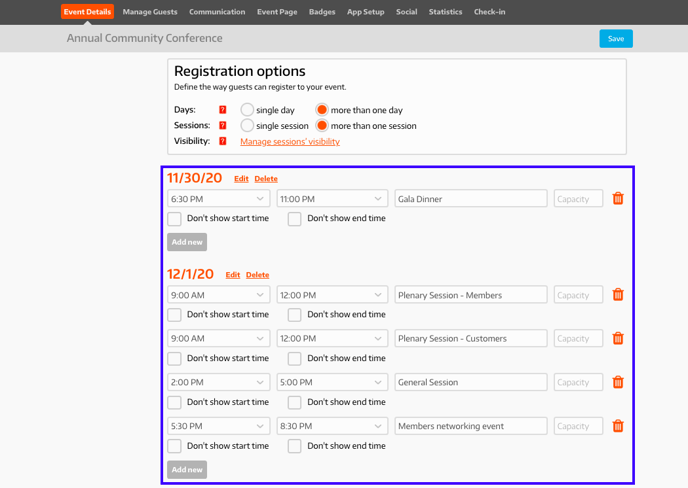
Now, Lucida has to configure the visibility of each session. In particular:
- The "Gala Dinner" will take place the night before the event and it can be visible to all guests types. Therefore, she doesn't need to select any values and associate them to the session.
- The "Plenary Session - Members" will take place the day after the Gala. It is a breakout session reserved for guests who are "Member" type.
- The "Plenary Session - Customers", similarly to the previous session, has to be visible only to guests who are associated with the value "Customer".
- The "General session", instead, has to be visible to all types of guests excluding the ones associated with the value "Staff".
- In conclusion, the "Members networking event" is private and reserved only to Members and Sponsors, and therefore, it has to be visible only to guests who are "Member" and "Sponsor" types.
In the video below:
- Lucinda clicks the "Manage sessions' visibility" link,
- chooses the "Guest types" field that will be used as a "trigger" to initiate the logic,
- selects for each session the values she wants to use to set the session's visibility for a specific type of guest,
- clicks the Save button so that she won't lose the work done
How to set events and sessions visible for accompanying guests
If your event allows participants to add accompanying guests during their registration, you can choose whether they are automatically registered to the same dates and sessions or are allowed, instead, to register to events and sessions different from the ones selected by the primary guest.
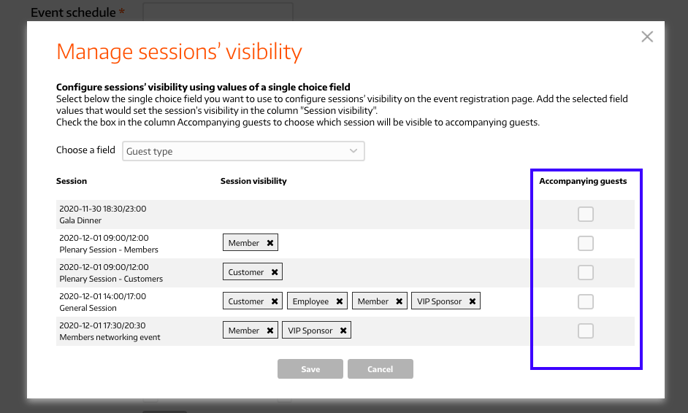
If you have checked the option "Allow different date/sessions", the "Accompanying Guests" column will appear in the Manage Sessions' Visibility pop-up. It will allow you to determine which event or session would be visible to accompanying guests, regardless of the value associated with the main attendee.
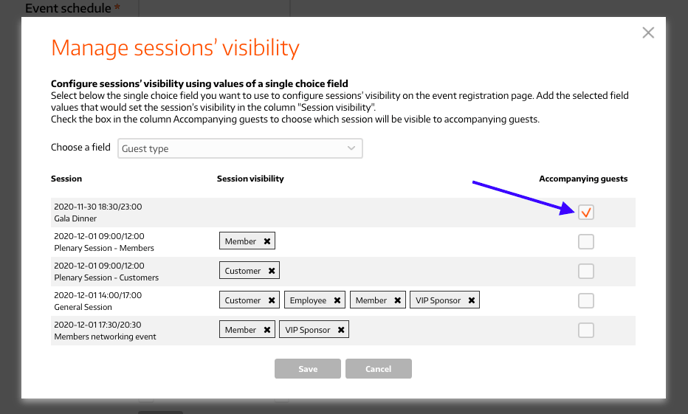
In the example below, the Gala Dinner is open and visible to all attendees, regardless of their type. Our user Lucinda wants to make sure that accompanying guests can only register for the Gala; therefore, she selects the Gala Dinner "Accompanying guests" checkbox.
See you online!