This article explains how you can reach out to multiple guest categories with dedicated and targeted email messages
Eventboost allows you to manage different types of email messages by choosing among a variety of different templates.
Check the following article to learn more about Eventboost email messages and customizable templates: "How many Email Templates does Eventboost Support?".
While the Confirmation is a unique and automated message for all your registered guests, you can create Invitations and Custom email messages to target different audiences, at different dates and times.
For example, do you have multiple guest categories and want to tailor different invitation emails? Or maybe you need to re-send the invitation email only to those guests who haven't registered yet?
See below how you can easily set and filter recipients of your email messages.
Invitation message
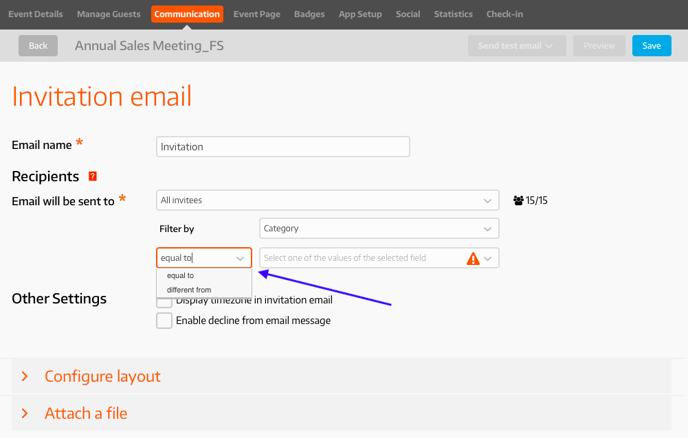
When creating an Invitation email, you are required to fill in two mandatory fields: the email name and its recipient.
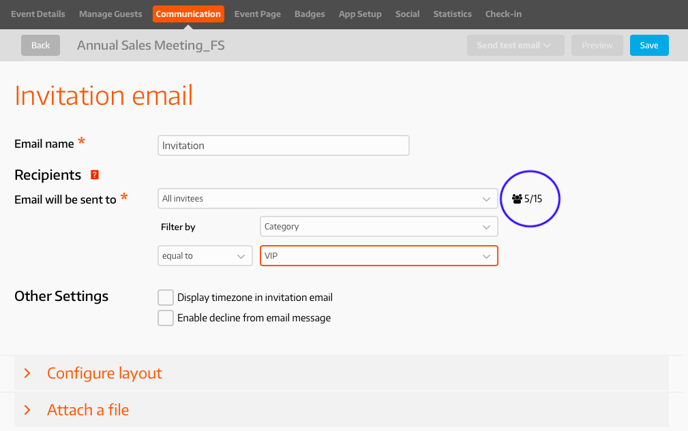
The headcount in the blue circle below shows emails that will be sent out by default to all invitees in your Invitee List (All invitees). The left figure tells you the number of recipients for this particular invitation, while the right one is the total number of guests in your Invitee List.
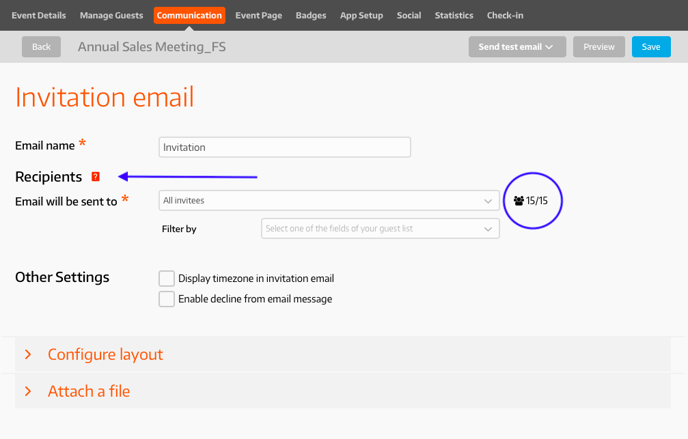
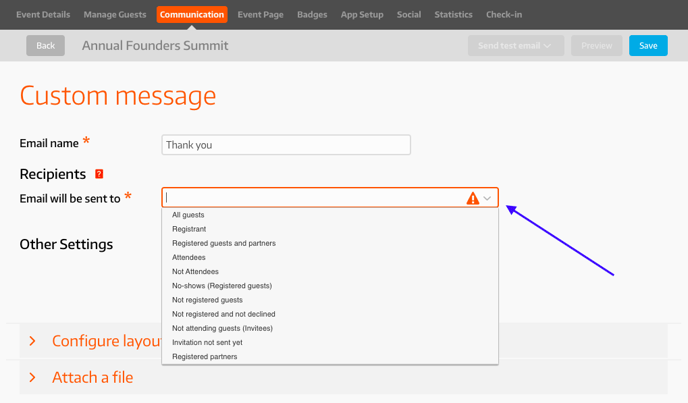
As you can see from the screenshot below, Eventboost already provides you with a set of recipients by default: All Invitees, Not registered guests, Not registered and not declined, Invitation not sent yet, Email not opened.
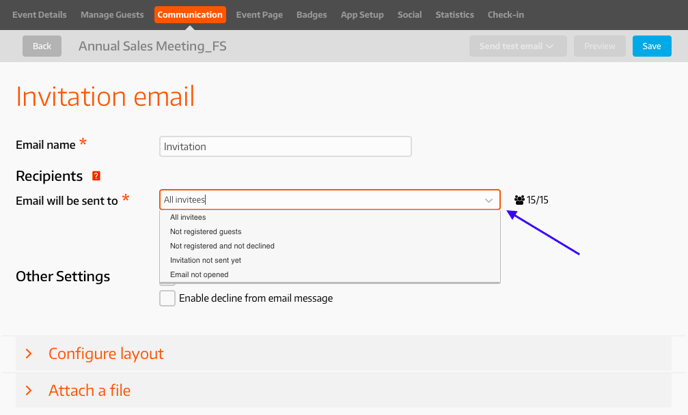
Once you choose the email message recipient, you can then apply filters using existing fields to flag the group of guests you want to target.
Note: Eventboost allows you to filter your database of contacts by using Single-choice, Multiple-choices, and Country fields type only. To learn more about fields and how to use them, check some helpful articles below:
In the example below, we are using the custom "Category" field. It is a filtrable Single-choice field type that includes the following values: VIP, Ordinary, Staff, ad Management (these are options that populate the single-choice field drop-down menu). We can then decide whether our filter has to be equal to or different from one of the drop-down values mentioned above.
In the screenshot below, we have applied the following condition: Invitation email will be sent out to "All invitees" who belong to the "VIP" category. In other words, the invitation email will be sent out to "All Invitees" who have been flagged as "VIP" in the Invitee List.
When the condition is applied, Eventboost will automatically update the headcount (see the blue circle below).
Once you have set up the email message recipient, you can move forward and configure the Invitation message layout.
You can change email recipients and update filters at any time, even if the message has already been sent out.
Custom email message
As for the invitation email, you can select the recipient of your Custom message too.
While the Invitation email aims to reach out Invitees only, a Custom email message allows you to target any type of guest, regardless of their status or category.
Let's assume you want to send out a Thank you message to all VIP guests who attended. The video below explains how you can easily configure it.
- Select "Attendees" from the drop-down menu next to the "Recipients" field
- Click the "Filter by" option
- Choose the "Category" field
- Select "equal to" and click "VIP"
You can then design your Thank you message and send this email to the VIP attendees only.
See you online!